
This is not one of those ideas that's going to make me millions but it sure was a lot of fun to make. The inspiration came from the Make Anything Channel where Devin Montes did a video titled "Super Satisfying Twist Containers". I took this idea and ran with it. As with most ideas, the end result wasn't the original intention. It just kinda snowballed as they usually do.
After experimenting with my own twist container designs and recording a how to video with Fusion 360, it was time to print a giant one. I maximized the size for my Prusa i3 MkII and took out the GoPro for a time-lapse video. If you would like to learn to design your own stuff in Fusion 360 I also have several online video courses to get you started.
Some projects have this ability to just capture you and this was one of them. The smoothness of the spiraling motion between the two twist containers was just so oddly satisfying as Devin put it.
I love electronics and combining 3D printing with anything Arduino related is my happy place. Therefore, the obvious next step was to automate the twist container. I thought of different ways to tackle this and decided to go with a servo motor, pully, a magnet, and a rope. Keeping it simple is always a good way to start.
I had an aluminum extrusion set that I picked up one year at the World Maker Faire which allowed me to quickly throw together a frame. I attached the servo motor and an Arduino Uno, uploaded some code, and the automated twist container project was alive.
This was the first prototype and there was plenty of room for improvement. The aluminum extrusions did the job but it wasn't the most aesthetically pleasing frame. The timing of the servo motor was based on delay statements which wasn't the most accurate way to go. After a few cycles the timing would be off and the magnet would fail to attach or detach. The design also desperately needed LED's. As a result, version 2.0 was created.

The first design upgrade was to go with copper pipes for the frame instead of the aluminum extrusions. After cutting the sections to size with a pipe cutter, I did a dry fitting to make sure all the sections lined up properly.
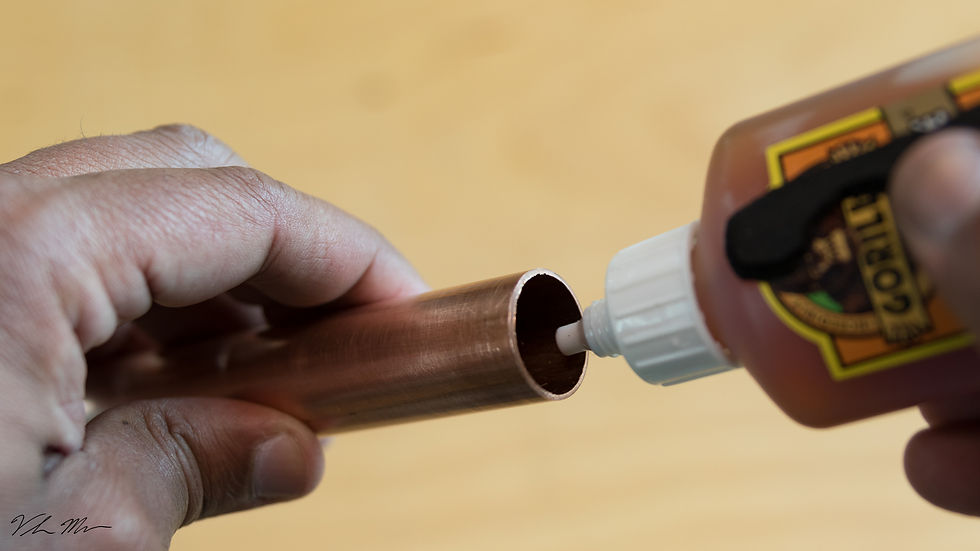
Once I was certain the pieces were the correct sizes, I applied some Gorilla glue for a permanent connection. Gorilla glue needs moisture to bond so I made sure to moisten the pipes prior to application.
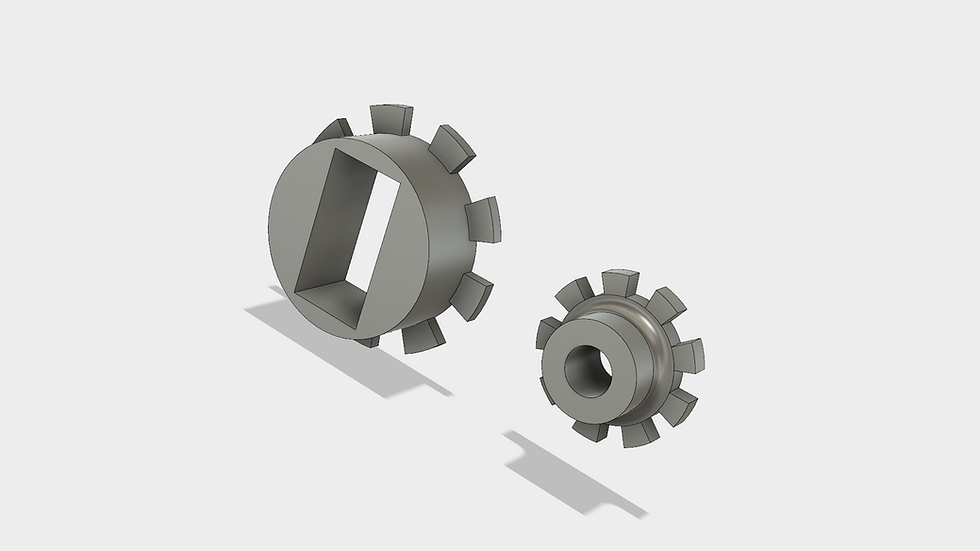
I designed the servo motor mount and the pulley above in Fusion 360. These were printed and spray painted a copper color. After press fitting the servo into the mount, it was glued inside the pipe fitting. The pulley was glued to a servo arm and attached to the motor.

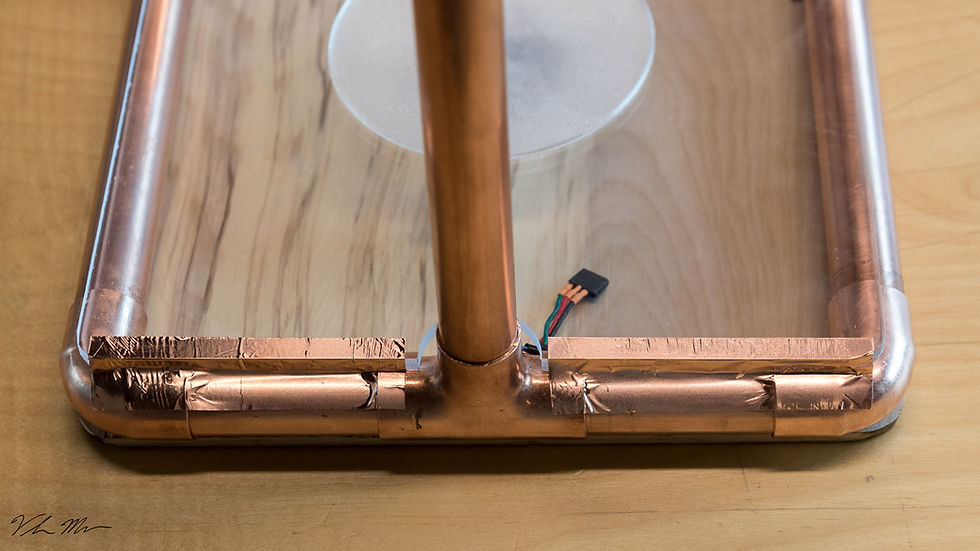
The next upgrade was to add a limit switch to fix the timing issue. The purpose of the limit switch is to reverse the motor only when the container is released. No more relying on delay statements. The limit switch is encased inside a 3D printed cylinder that is glued in the pipe fitting. The motor used was a micro servo motor (continuous rotation) instead of a full sized one. This allowed me to conceal the motor inside the pipe fitting. The wires run on the inside of the pipes and come out through a drilled hole at the base.

The third upgrade was to go with an Adafruit Circuit Playground board instead of an Arduino Uno. The main reason for the change was that the Circuit Playground comes with LED's already installed which makes the assembly a lot simpler. However, I did not want to use alligator clips so I designed this screw terminal block. I also recorded a Fusion 360 tutorial on designing this model which you can find here.

The wires from the limit switch and servo motor were soldered to an Adafruit Perma-Proto board and then attached to the Circuit Playground with the 3D printed screw terminal block.

For the clear top I used a table saw to cut a piece of 5mm thick acrylic. I used a grinder to give it some rounded corners and a drill press to cut the half circle on one side. I did the same with a wooden base (minus the half circle). Acrylic has a glass-like transparency that allows the copper to be visible and will allow light from the Circuit Playground neopixels to shine through.


I wanted easy access to my electronics so I chose to go with a hinged mechanism. The simplest way I could think to do this was to use some copper tape that I had. The copper tape did the job without detracting from the look.
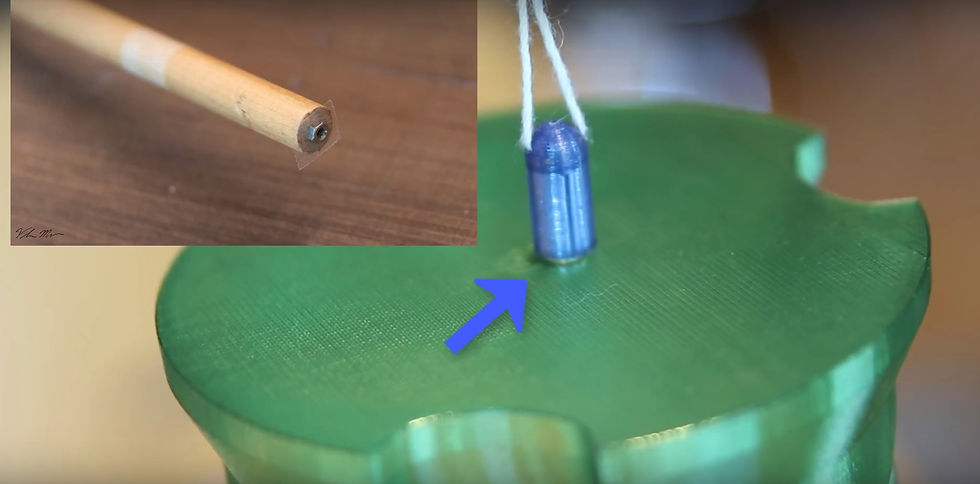
A magnet inside the blue 3D printed casing snaps to an M3 nut that was glued to the inside of the twist container in order to pull it up. To glue the nut to the inside of the container, I used double sided tape to secure the nut to this dowel and used the dowel to transfer the nut to the inside top of the container. I added a bit of hot glue to the nut and held it in place using the dowel until the glue dried.
In order to keep the inside twist container in place while the top container is being twisted, this 3D printed platform was printed and hot glued to the acrylic base. I chose to go with clear pla as to allow as much of the light through as possible. The clear pla will also not change the color of the light. Since the neopixels are individually addressable on the Circuit Playground, I can simply change the color in the Arduino code. The final version has a hole in the middle.

All that's left to do is plug in the Circuit Playground and upload the Arduino code.

Below is a video of the complete build. This was a fun project to build that combined 3D printing, electronics, programming, and mechanics. It also leaves me with a fun visually captivating kinetic sculpture to take to Maker Faires and other events. I place this thing on my booth and it is a magnet for curious makers. Below is a video of the entire build process. I will also leave a links to the .stl files below. Enjoy!
My big aha! moment with Fusion 360 happened when I finally understood how to use Constraints. Get my free Fusion 360 Constraint Cheat Sheet and see what I mean.
STL files
